February 27, 2013

Mom's Beloved Orange Birthday Cake

Last weekend was my Mom's 70th Birthday!  She always wants me to make her the same birthday cake.. the cake her Mom made for her every year as a child - Orange Cake!  I love doing it because it's a nice break from the chocolate, vanilla, yellow cakes.  This cake is very yummy, with a light taste and texture.  My Grammy always made it with applesauce filling and 7-minute frosting, so of course I make it the same way for Mom.  This is the only cake I've ever made 7-minute frosting for.  It's sort of a finicky frosting that takes some effort to make (for me anyway), but it always turns out good in the end, and it's worth all the work when my Mom bites into her piece of cake and says "You've done it! ..you've taken me back to my childhood." :) 

The cake recipe itself is actually out of my Cake Doctor book, because my Mom has been unable to locate Grammy's original recipe.  It makes enough for two 9-inch pans but I did a 10" round cake so I tripled below.  
  
Orange Cake
1 Yellow cake mix
1 cup fresh orange juice
1/2 cup vegetable oil
1/4 cup granulated sugar 
1 teaspoon vanilla extract
3 large eggs (the book calls for 4 but I wanted to follow the amount on cake box)
 **I also add the zest of 1 orange to this batter - for additional orange flavor and texture**
 
Filling
 Regular applesauce, drained well in sieve or strainer
 
The 7-minute frosting recipe is one that I've used for the past couple years.  It's actually a Paula Deen recipe, but Mom loves it and claims it tastes just like Grammy's did, so I stick with it.  I also tripled this because I wasn't sure if it would make enough, although it actually made a lot more than I ended up needing for my 10" cake (note to self).

7-Minute Frosting
1 1/2 cups sugar
1/4 teaspoon cream of tartar
1/8 teaspoon salt
1/3 cup water
2 egg whites
1 1/2 teaspoons pure vanilla extract 
Place sugar, cream of tartar, salt, water, and egg whites in heat proof bowl and beat for 1 minute.  Place bowl over boiling water (homemade double boiler since I don't have an actual double boiler), being sure that boiling water does not touch the bottom of the top pan. (If this happens, it could cause your frosting to become grainy). Beat constantly on high speed with electric mixer for 7 minutes.  
**I always have to beat longer than 7 minutes.. it was more like 14!  Even then the frosting was still too soft to frost a cake with, so I placed the frosting in my Kitchen Aid and whipped it with the whisk attachment on high for another 5-10 minutes.. until it finally started to stiffen up.  I'm sure I just need more practice with this frosting, as I don't make it that often (think this was only my second time).  Once you're done beating/whipping, and the frosting is the consistency you want, gently stir/fold in your vanilla extract.  


Here are some pics of my Mom's cake.. I decided to add some orange peel embellishments as well.  I made shamrocks using a mini heart cutter and rolled up pieces of mint!  The base of the cake is decorated with grated orange zest and more sprigs of mint.


February 18, 2013

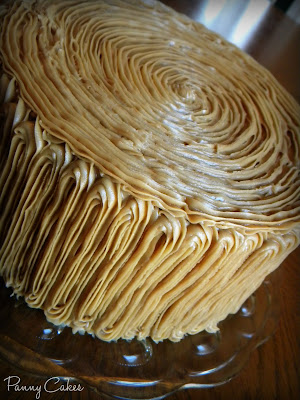
Caramel Latte Cake

Last week was my hubby's birthday.. for his cake I knew I wanted to do something coffee related, since he's a coffee nut!  I mulled over several ideas and recipes before finally settling on a 'Caramel Latte' Cake!

I started with a golden butter yellow cake batter, to which I added a bit of espresso (espresso powder dissolved in hot water).. the cake was rich and very tasty but I think I would add a bit more espresso next time for a stronger coffee flavor (it was my first time making this so I didn't want to go overboard with the espresso ;)


For the caramel filling, I chose a Paula Deen recipe (below) I came across in my research, which was amazing in this cake!
1 cup (2 sticks) butter
2 cups packed light brown sugar
1/4 cup milk
1 teaspoon pure vanilla extract
In a saucepan, combine butter, brown sugar, and milk. Cook and stir over medium heat for 3 to 5 minutes. Remove from heat and stir in vanilla.   The filling will seem too liquidy to put in between cake layers, but because it's caramel, it stiffens up and stays in place quite well.


The frosting was a Caramel/Espresso combination that I sort of created:
 1 cup butter (2 sticks)
2 cups packed dark brown sugar
1/3 cup heavy cream x2 (more if needed for consistency)
7 cups sifted confectioners' sugar
3 tsp espresso powder, dissolved in 3 tsp hot water
Melt butter in a saucepan over medium heat and stir in brown sugar and cream. Bring to a boil, and transfer to a mixing bowl. Add confectioners' sugar and coffee mixture. Beat until it reaches a spreading consistency. At this time it may be necessary to add a tablespoon of heavy cream, or more, if frosting gets too thick.

I had never made a 'caramel' frosting before and discovered it can be tricky to work with.  The frosting hardens pretty quickly after being put together, so if you're not going to be frosting right away (as I didn't), there are a few tips I can offer to make working with caramel frosting a bit easier.  First, I added a bit more heavy cream and re-whipped it with a spoonI also heated it frequently in the microwave, as I was frosting, at 30 second intervals which worked very well.. just heat and give it a stir each timeI actually frosted the cake with a tip (which is how I frost all my cakes but I typically smooth them afterward).. I didn't smooth this one because I liked the 'piped-on' frosting look.  The cake was yummy and the hubby loved it :)


Walking Dead Cake

Two weeks ago I completed a 'Walking Dead' cake for my long-time friend's bf.  Apparently he is a huge fan of the show.  A while back she had mentioned that this was what she wanted to do for his birthday cake.. which meant some research on my part.  While I knew it was a TV show, I had no idea what the heck it was all about.  I used some online pictures I found of 'walking dead' cakes for inspiration.  My friend decided on a chocolate/peanut butter cake, so I made my specialty - dark chocolate fudge cake with peanut butter filling and peanut butter buttercream.

The topper is made of fondant, with some edible painting going on.  The bloodwork is red Wilton icing color painted on with a small brush (which I use only for cakes of course).  My friend came to the house to pick it up and loved it! {Yay!}  ..I asked her to let me know what her bf thought of it, since I wouldn't get to see his reaction.  I was later told he loved it as well.. and that it tasted awesome! {Yay again!}  ..here are some pics of the cake.


February 8, 2013

'baby' cakes

Last weekend I hosted a 'Girls Night/Baby Celebration' for my step-daughter, Michaela, who is expecting.  I had so much fun with this party!  ..(should be getting up some photos soon on my Parties page).  Of course I couldn't have a party without some sort of sweet treat.  I decided minis ('baby' cupcakes) would be most appropriate ;)

I picked my step-daughter's brain for some flavor ideas.. the first flavors she mentioned when I asked her were 'chocolate and vanilla'.. easy enough.. I made dark chocolate fudge minis iced with vanilla buttercream.  She had previously mentioned liking the look of 'ombre' cakes (basically just a graduating tint of the same color), so I frosted the 'baby cakes' in this fashion, using pink because that was one of the main color schemes at the party.. she loves pink and what better color for a girls night!


Mario Brothers Cake/Cupcakes

Next up - Mario!  I hadn't actually done a Mario Brothers cake previously, however, I did assist my step-daughter with one she made for her boyfriend's little guy.  It was fun but some work ..and she did a simple 8" round cake.  The order I got was for a 2-tier cake with 18 cupcakes!  It took me an entire week to make all the fondant cupcake toppers, plus the fondant accents for each cake tier - whew!  Those little guys are so detailed and I'm sort of a perfectionist.. so.. after a week of sculpting them, I never wanted to see a Mario character again!  Anyway, after a very long week, as usual it was all worth it!  I was happy with how they turned out, and my client loved it.. especially the birthday boy.. his whole face lit up when he saw the cake! :)  ..Cake is dark chocolate fudge with peanut butter filling and buttercream icing.  Cupcakes are fudge marble with buttercream icing.


February 7, 2013

Snowmobile Cake

Aghhhh.. I'm so behind on my blog!  ..too busy lately!  So two weeks ago was my big bro's Birthday.  He was just having a small family gathering at my mom's and told me to keep his cake 'simple'.  (Yeah Right!)  I remembered him asking me back in November about doing a 'snowmobile' cake.  I sort of laughed it off at the time.. but when the time came I knew that's what I had to do (even though I'm pretty sure he forgot all about it).  

I decided to make a fondant replica of his snowmobile, so I had his girlfriend send me a picture of it.  I stared at the pic for days.. pretty sure I had bitten off more than I could chew ;)  ..Finally I just started playing with the black fondant.. and two days later I had something I was pretty happy with but it needed detail.  I attempted to re-create the decals on the sled using cut up Wilton Sugar Sheets.  (I wanted everything to be edible!)  I envisioned the snowmobile in a wintery scene.. in the woods.  So I made evergreen trees out of sugar cones and piped on green icing.  Then I dusted them with powdered sugar.  I loved how they turned out - they looked real!  I frosted the cake 'rustic' style (to look like snow).  

When I asked my brother what flavor cake he wanted, he responded with two words - 'chocolate and peanut butter', so I went with dark chocolate fudge cake and peanut butter filling.  The cake is frosted in white buttercream.  It was yummy.. my sister even ate one of the trees! :)


 ..reaction to his surprise snowmobile cake :)
  

..don't catch the trees on fire!
 
 
 ..all aglow.. prettiness!

{bro and his real sled}