November 13, 2012

50th Anniversary Cake

So two weeks ago (yes I'm a little behind in my blog entries ;) ..I made a 50th Anniversary Cake.  I was super excited for this cake for two reasons.. First - I was given the couple's original wedding cake topper from 50 years ago to place on their Anniversary cake (how cool is that!!) and Second - I was going to ice the cake in 'rustic' style buttercream (which is basically a messy, non-smoothed look) which I've been dying to do!

I actually suggested the 'rustic' style frosting to the client, who is my sister's long time friend.  The cake was for her parents, and as I was mulling over the design for their cake, one of the words that came to mind when thinking of this particular couple was 'rustic'.  So I thought "this is my chance!" and asked the client if she liked the idea.  She was fine with it, in fact, she also let me have free reign with the flavors of one of the cake tiers (yay!)

I was pleased with how the 'rustic' icing turned out, especially for my first attempt.  It's not difficult but does take some work to get it to look right.  I'll say this.. I'd rather frost a cake rustic than smooth any day.  Basically you just mess up your icing with either the back of a spatula or spoon (I used a spatula).  But while I loved the rustic icing technique, my absolute favorite part about this cake was the topper, hands down!  I loved how it gave the cake a vintage feel, while still looking elegant and rustic all at the same time.  

And here it is... The bottom tier (client's pick) is French Vanilla cake filled with fresh Raspberry Mousse, which was yum.. loved the mousse.  The top tier (my pick) is Spice cake filled with Applesauce.. just one of my fave combos for this time of year.. and the client said it was "amazing."  The cake is iced in all-butter buttercream (no shortening).  I hung around after delivery to see the guests of honor as they arrived at the restaurant.  The cake and topper were a surprise and I wanted to see their reaction, mainly to the topper.  Mind you, the client said her parents would never recognize it after all these years.  I told her "of course they will, it's their wedding cake topper!".. well.. much to my surprise she was right ;)    


 ..and my cake table sign


November 4, 2012

Zelda

Last week I worked on the Birthday cake for my nephew, Tomy, who is obsessed with the video game Zelda! {which of course became the theme of his cake}.  It was just a simple sheet cake with a Zelda edible image.  I'm not a big fan of EI's, simply because there is very little else for me to do on the cake (no fun ;)  ..My sister attempted to find a little Zelda figure to place on the cake but was unsuccessful, so she opted for the EI.  Oh well, Tomy loved it and that's all that matters :)


Here's a pic of the completed cake, which is fudge marble with vanilla custard filling and whipped cream icing. 


..and the Birthday Boy!


October 24, 2012

Wedding Cupcake Tower

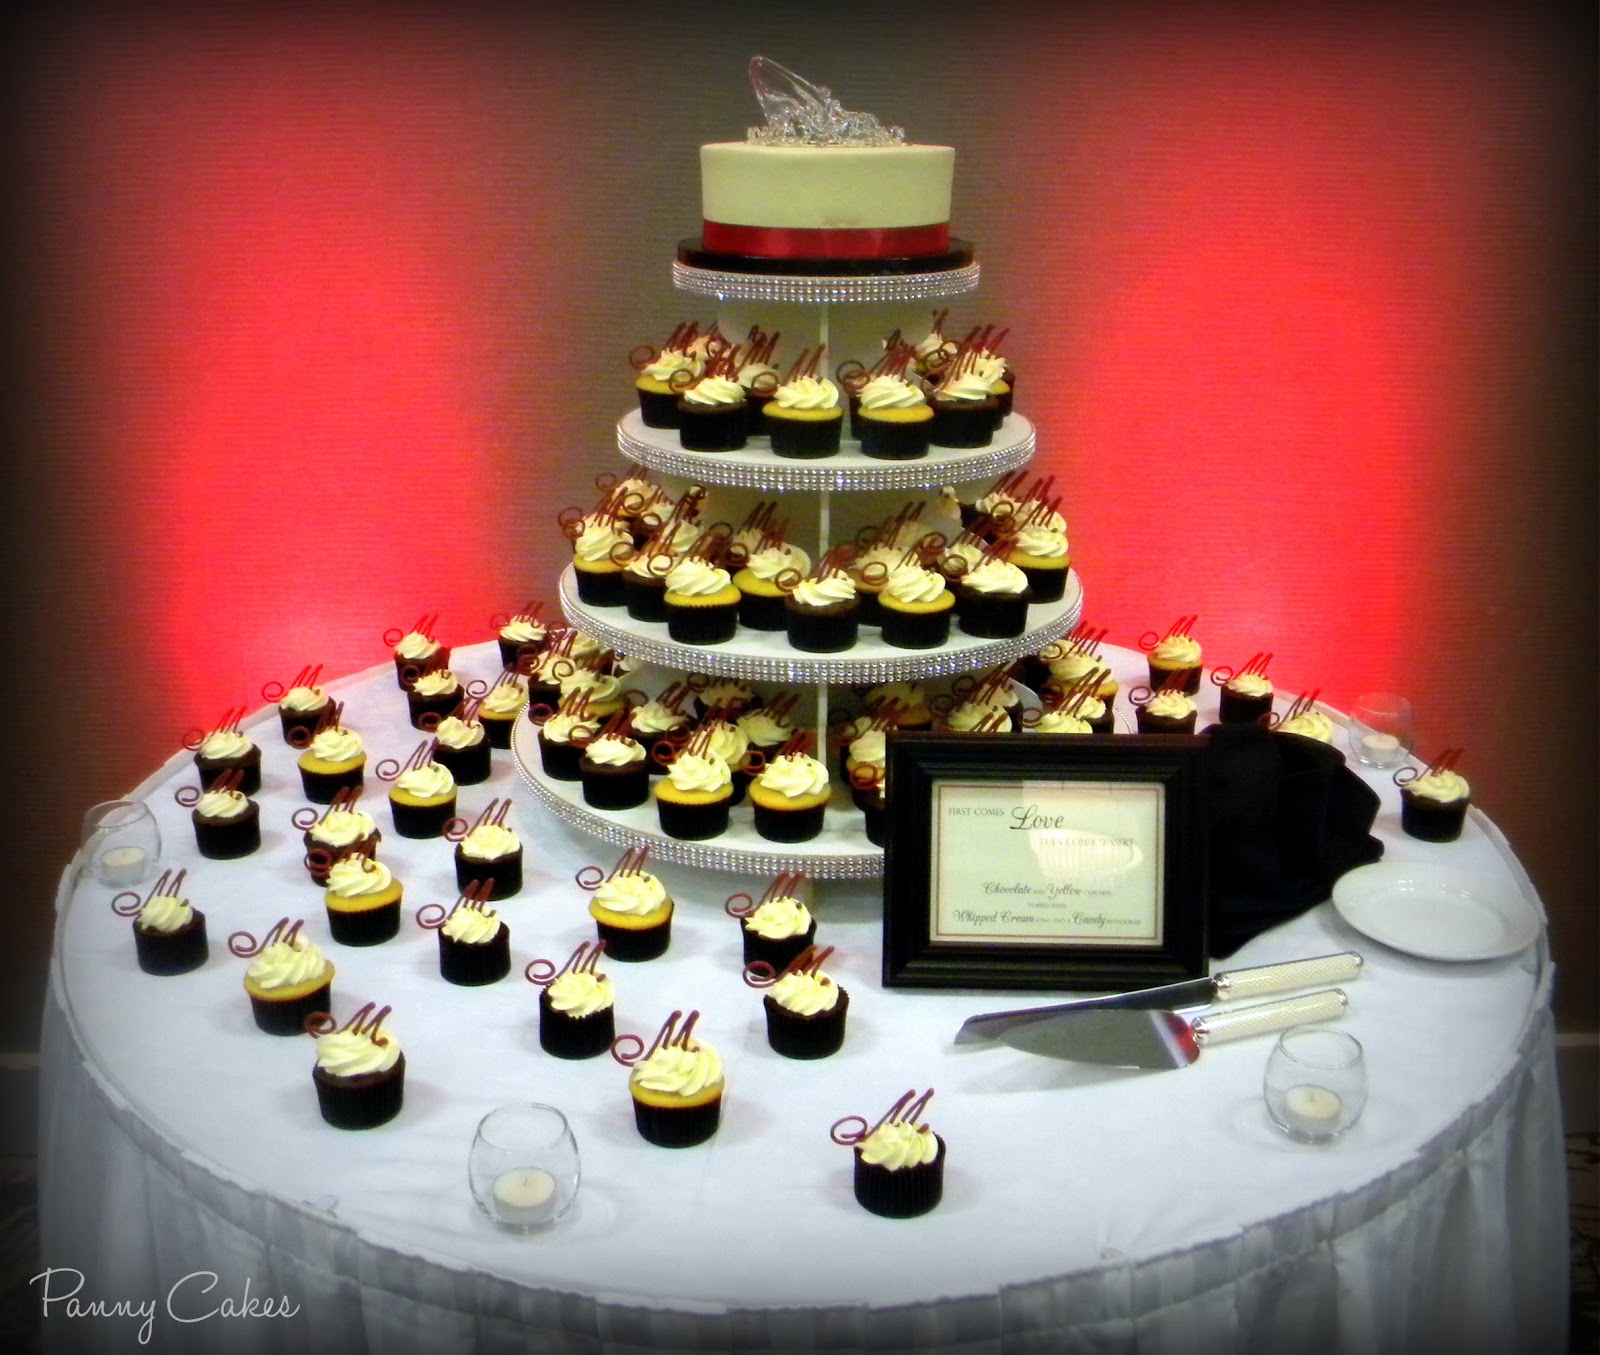
Last week I had the pleasure (or stress.. depending on how you look at it ;) of doing my second wedding.  The couple wanted a cupcake tower with a small cake at the top for them.  I was super excited because I love cupcake towers and this was going to be my first.  The order was for 200 cupcakes (whoa!) with the couple's monogram, 'M', atop each one.  The bride also wanted the glass slipper that the groom gave her when he proposed, as well as a tiara she had, incorporated as the cake toppers.

The biggest task for this one (aside from baking 200 cupcakes), was to make the 200+ 'M' monograms (always need extras).  Since the bride wanted the 'M' to match the font on their wedding favors, I chose to make them out of Wilton candy melts (sort of like chocolate but these were vanilla flavored - and yum!).  I had never actually done this technique but have seen it done many times and was excited to try it out.  Basically I printed out a sheet full of the 'M's, in the requested font, then placed wax paper over them and traced with a pastry bag full of the melted candy.  Then let them set up for about 20 minutes and carefully peel them off the wax paper.. Voila!  It's a pretty easy technique but very tedious (especially when you've got 200 to make!)  Also, some will inevitably break while trying to remove them from the wax paper.. one reason to make lots of extras.  I bought the candy melts in red, but since the bride's color was more of a deep apple red, I had to add a bit of black candy coloring to get the right shade of red.  I think they came out very elegant looking.. and looked beautiful on top of the cupcakes!


Here is the completed tower at the wedding reception!  The Cake is sugar-free yellow with sugar-free icing.  The cupcakes are a mix of chocolate and yellow, topped with whipped cream icing and a candy monogram.  I love how it all turned out - so beautiful and fit right in with the couple's oh so elegant affair!


..and here is the sign I made for the Cake table ;)


October 8, 2012

May The Force Be With You

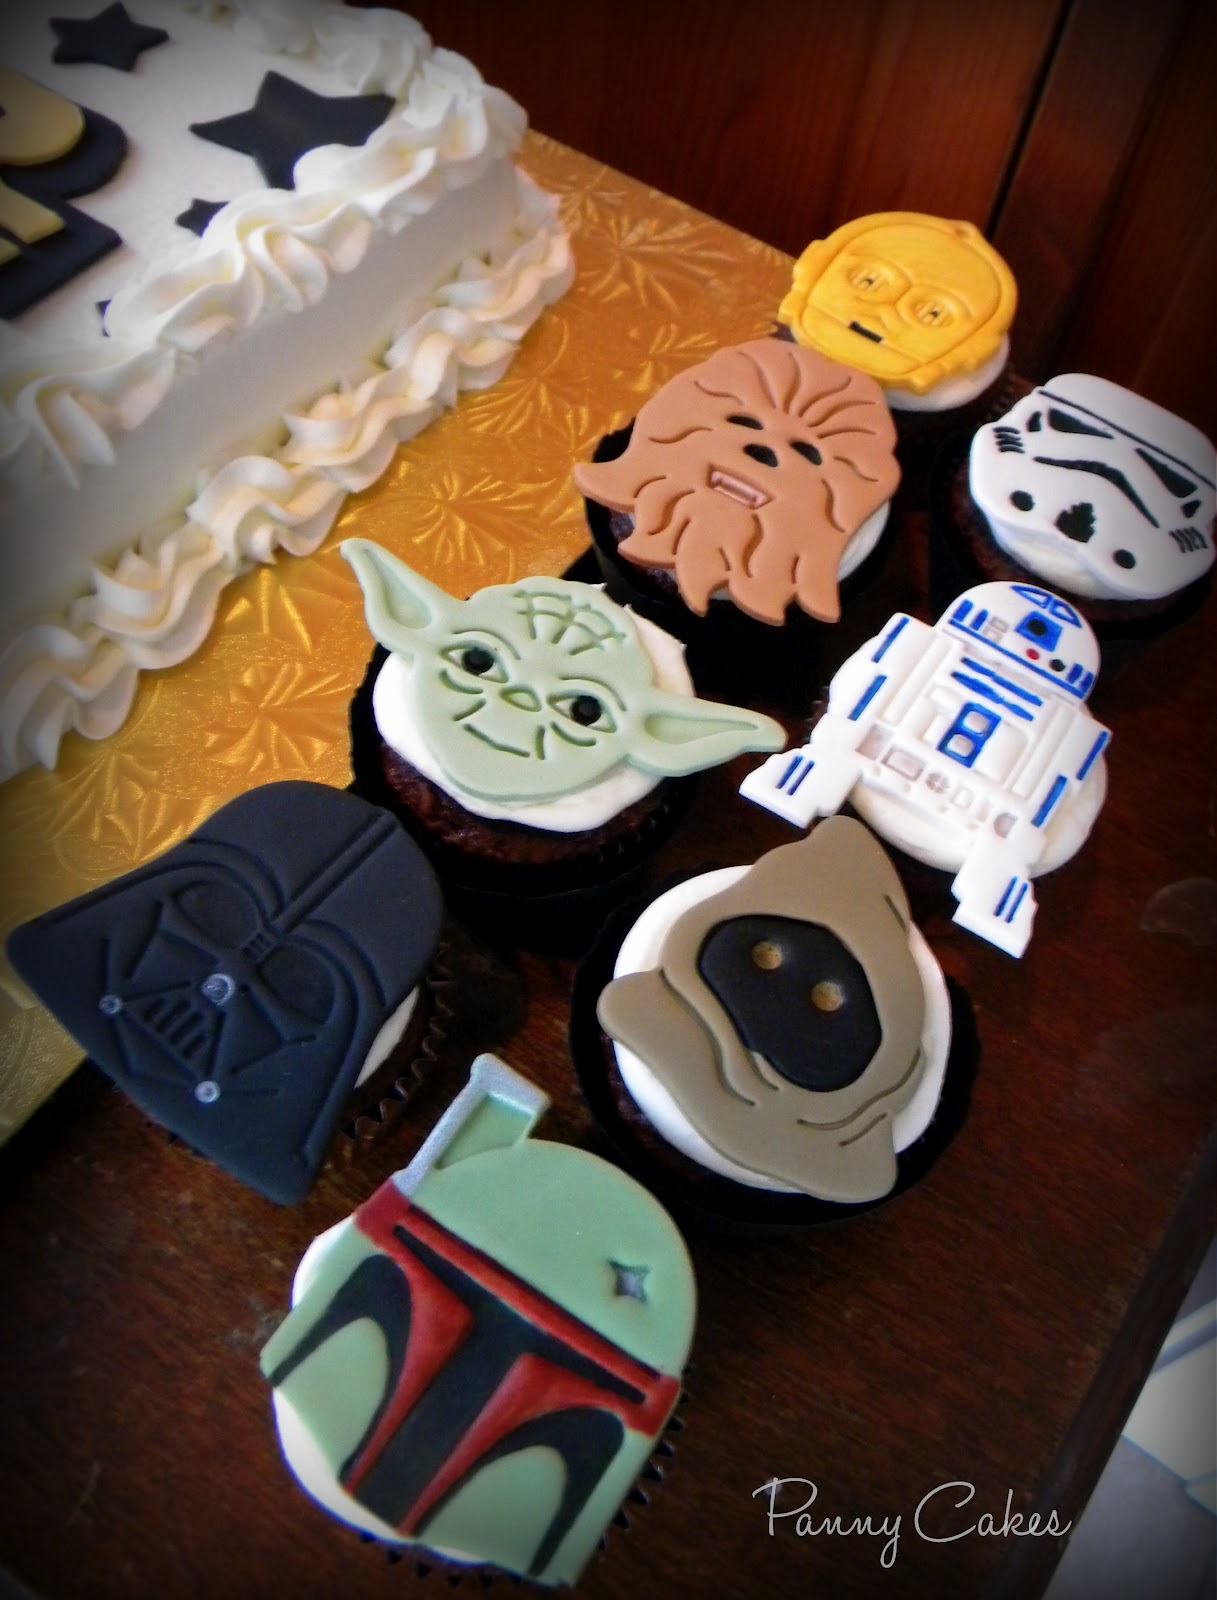
Last week I completed a Star Wars themed Cake and Cupcakes for a little guy who turned 4.  When his Mom said they wanted Star Wars I thought "cool.. don't get that one much.. actually at all, yet".  I was super excited because it's a classic, and something different from all the usual Marvel superhero requests.  So I went to work!

First I decided on a black and gold color scheme, since many of the logos I came across in my research were these colors.  The cake would go on a gold board wrapped in black ribbon, and the cupcakes would go in coordinating gold and black wraps.  I made the black wraps and added a 'starry' print to them with a gold that matched the other wraps...


The client wanted 2 dozen cupcakes with fondant Star Wars characters on them, and a small sheet cake with the logo on it.  I had some Star Wars cutters which I used to cut out the characters, then hand painted all the details onto the fondant (using edible icing colors mixed with vanilla).  The logo, I traced out of fondant as I've done with other cakes.  I loved how both turned out!  Here are the finished cake and cupcakes.  Both are chocolate cake iced with vanilla buttercream.


October 2, 2012

Retirement Cake (AKA the suitcase cake)

A few weeks ago my step-daughters asked me to make the cake for their mom's retirement party.  I said "of course! ..what do you want?"  I received a picture of a suitcase cake placed on top of a map (since she will be traveling).  In addition, one of the retirees' favorite books is Dr. Seuss's "Oh, The Places You'll Go!".. so the girls wanted that message incorporated as well.  {I thought that was a super cute idea}.. The other request - all chocolate!

I had fun with this one!  The cake is dark chocolate fudge, filled with chocolate mousse, and iced with chocolate buttercream.  The suitcase accents are all fondant/gumpaste.  I purchased a world map, had it laminated, then attached it to a large sheet-cake board.  The letters for the message are fondant as well.  Everyone at the party loved it.. in fact, it brought one of my step-daughters to tears when she saw it. {Yay! Mission accomplished!}

Here are the pics :)


September 20, 2012

Sarah's 'Rockstar Glam' Birthday Bash!

Last Friday evening was my sister Sarah's Big Surprise Birthday Bash... and what a Blast it was!!!  I chose the theme based on two of her favorite things in life - music and makeup.  More about the party itself will follow on my Parties page in the near future.  

When it came to the cake, I decided to make Angel Food Cupcakes for her party, since a month ago or so I asked her what she would like for her birthday if she could have anything she wanted (cake-wise that is ;) ...and she said to me "can you make Angel Food cupcakes?"  Of course, why not?!  Well actually I didn't know how that would work because I was under the impression Angel Food had to be inverted while cooling (like the cake version), and how would I do that with cupcakes?  So I began doing some research and found many recipes online for Angel Food Cupcakes, that looked absolutely fine (not deflated) so I decided to give it a shot.

Now that the cupcakes were decided on, I knew I had to 'Rockstar Glam' them up somehow.  After much consideration I settled on cupcake picks as the way to go.  I wanted to have all her favorites incorporated so I began to round up a bunch of rock music and makeup logos, pics, etc.  

Here's what I came up with.. they turned out super cute!


And here are the finished cupcakes.. Angel Food with a Strawberry Swirl baked inside, topped with whipped cream icing.  
I made some fondant star toppers as well.  The cupcakes were yumm and went super fast at the party!  
We barely got to sing "happy birthday" before they were gone!  Sarah LOVED them!!!


September 10, 2012

Panny's Protege

Last week I had my 6 year old niece, Olivia, for a sleepover.  I made a plan with her to bake cupcakes the next day since she was going to be at my house most of the day.. which was her last day of summer vacation.  Well, needless to say, she absolutely loved it!  At one point she said to me "I wish I lived here.. I can't believe uncle Mike (my hubby) and Oliver (my 2 year old) don't love to do this all day".. to which I replied "I can't believe they don't either Liv" :)

Some pics from our awesome day...
 
 I told her she could choose from any of the liners I had on hand.. 
of course she chose 1 or 2 of each design :)


batter time.. look how focused she is!


 Aren't they super cute with all the different liners.. I love it!


  Cupcakes Baked.. on to step #2!


 Rule #1 in baking... taste EVERYTHING!


filling her icing bag..


 Look at those piping skills!


And now.. the best part.. decorating!!


 This one was made especially for 'Panny' ;)


One of my faves.. she put some of every decoration we had on this one!


 Creativity at its best!


Liv's masterpiece cupcakes!


 Her favorite one.. which she did not want to eat but said she would "keep for decoration"


Some 'pre-baking' fun outside!


{Olivia & Oliver}